Apache Airflow Integration
This tutorial will introduce using Apache Airflow as a workflow management tool within the Koverse. Airflow has many uses within Koverse as a scheduling tool, pre processor and data transport layer. We’ll walk through getting started with our Apache Airflow Docker Compose, configuring the setup to allow Airflow to authenticate via Koverse and then running some example workflows to get an idea of the flexibility and data engineering capabilities in the Koverse Data Platform.
Prerequisites
This tutorial assumes familiarity of Docker, Docker Compose, a working understanding of Airflow, and Python to fully complete. In addition to run these examples you will need access to a Koverse Data Platform workspace, and a local development environment capable of running Docker.
Getting Started
To get started clone our repository for Apache Airflow here: https://github.com/Koverse/example-projects/tree/main/airflow This repository contains a few example Directed Acrylic Graphs (DAG)s in the dags folder, the necessary scripts to allow Koverse to connect via OAuth to Airflow in the scripts folder. Internal logging for airflow and a Dockerfile that will allow you to install dependencies that are needed by the authentication flow and workflows that you create.
First build the custom image that contains the Python packages on top of the standard Apache Airflow image.
docker build -t koverse/airflow .
The airflow-init command only needs to be run once, this will generate the database migrations necessary to use airflow.
docker-compose up airflow-init
Once the initialization command has finished you are now ready to start up Airflow! To do this run:
docker-compose up
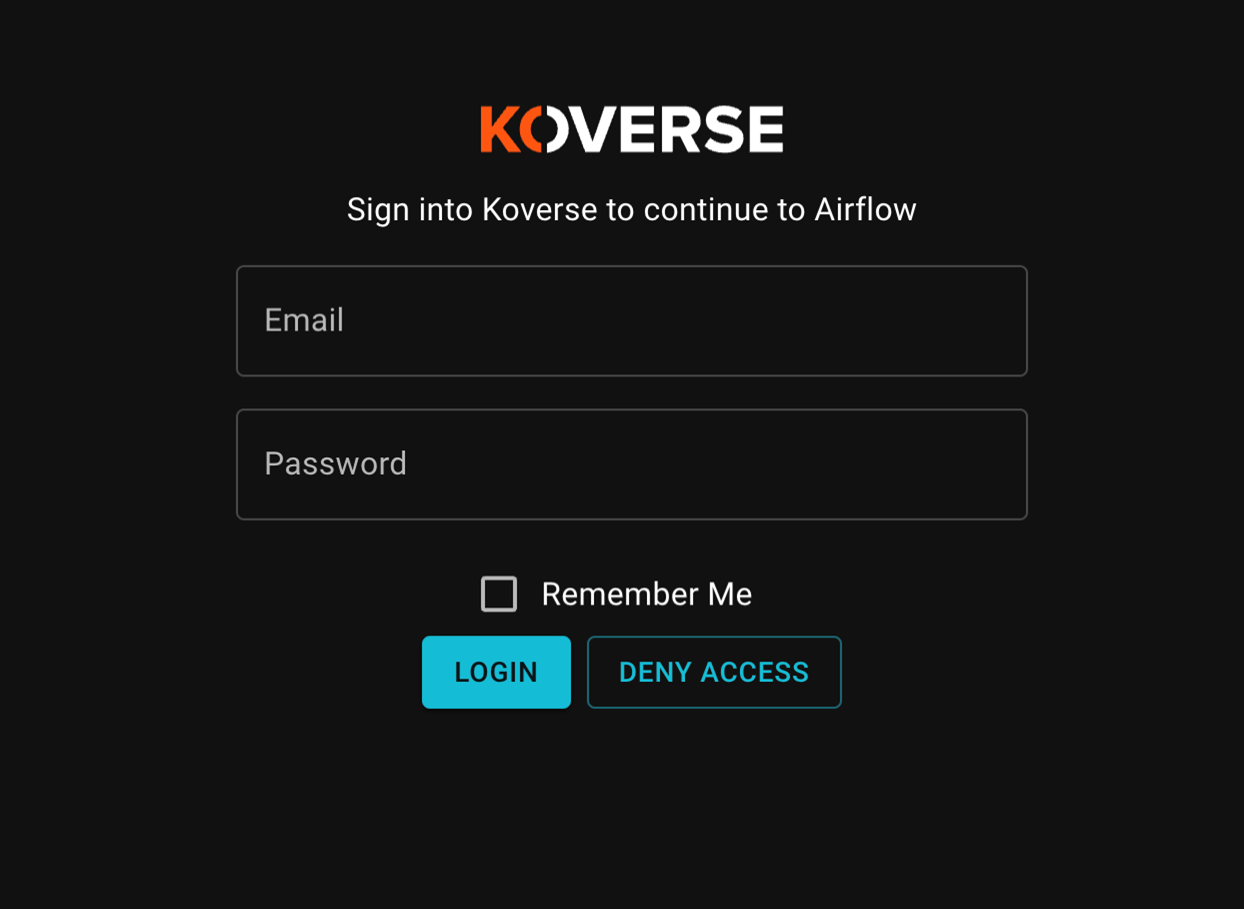
This will start up the airflow containers in a non detached environment piping the logs into your terminal. To verify everything is working properly navigate to localhost:8080 you should see a login screen asking you to authenticate with Koverse.
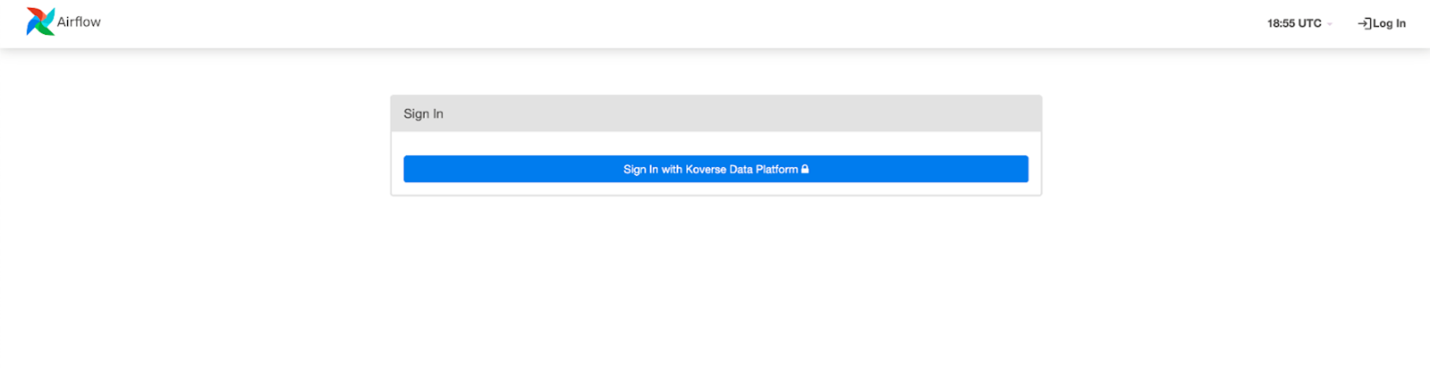
We aren’t quite there yet but in the next section we will complete the connection within Koverse which will allow you to log in with your Koverse account. For now stop the container with Ctrl+C there will be a couple of environment variables that will need to be set in the next section before we start back up again.
Connect Airflow to Koverse
In the following section we will walkthrough:
- How to create the first workspace in Koverse.
- Creating a base dataset to read/write into.
- Intro to the applications page and the initial setup for OAuth with Airflow.
Sign up for Koverse and create your first workspace
If you already have a Koverse account and a workspace feel free to skip to the next section. Otherwise take a moment to sign up for the free trial and create your first workspace.
Create a dataset
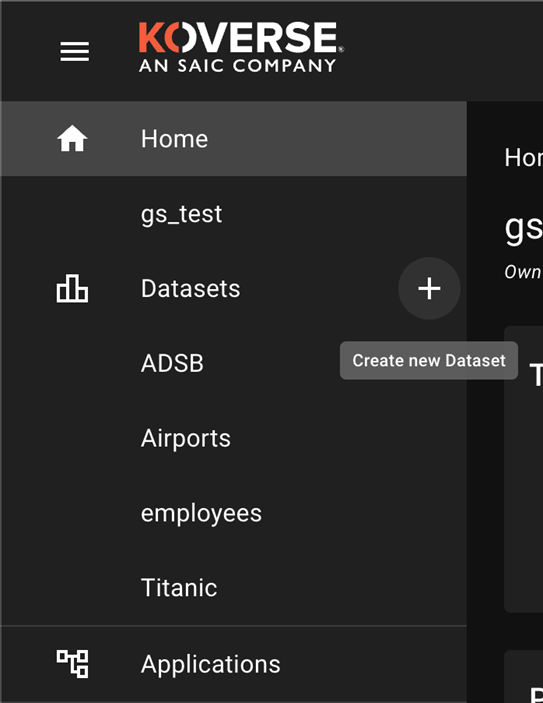
The first step will be creating a new dataset that we can use to load data in via Airflow, go ahead and select the plus sign on the left hand menu, you will be prompted to give it a name and a short optional description of the data you will be loading in.
Once the dataset is created grab your dataset ID from the URL and save this as we’ll need it in a later step to run against airflow.

Creating your first Koverse Application
Next navigate to the Applications tab, here we will configure Koverse to connect to the Oauth implementation in the Airflow repository.
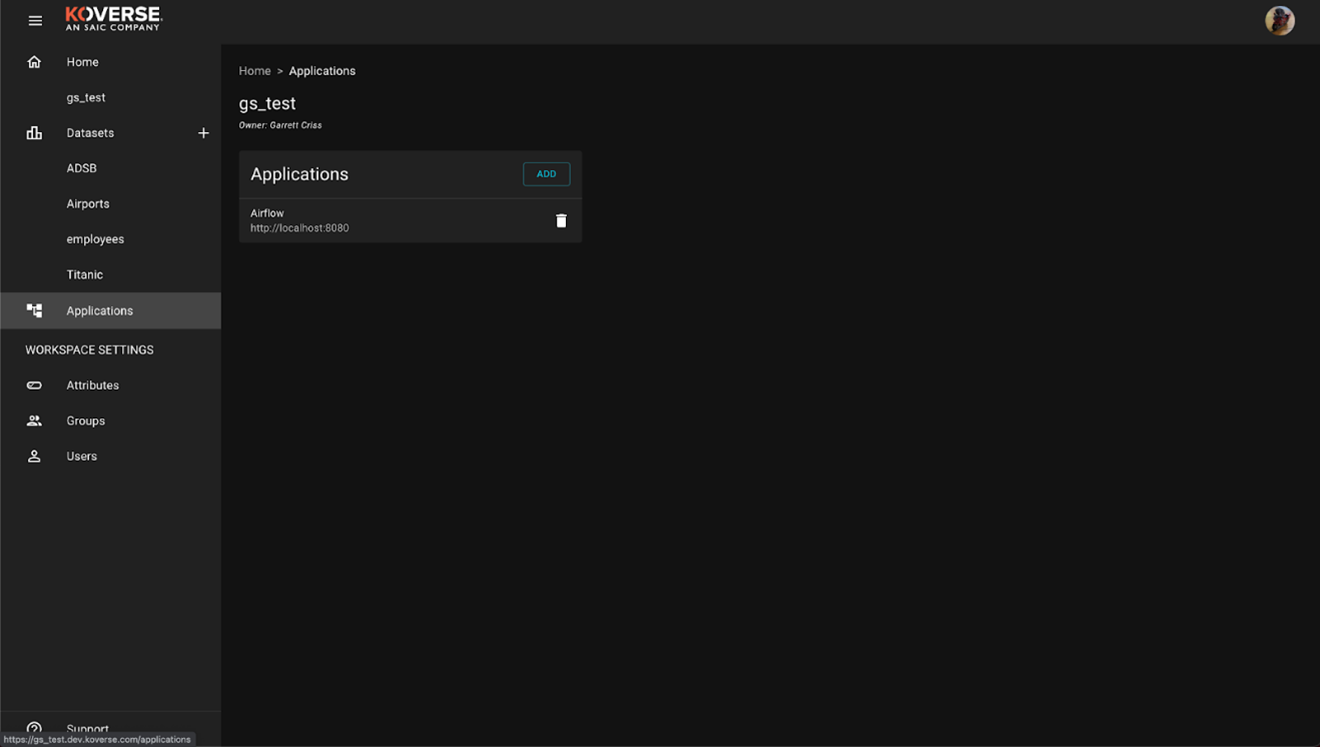
Next select Add, this will open up a dialog window. Give your application a descriptive name, Airflow will work here. Next the URL of the where the application is hosted. In this case locally, enter http://localhost:8080 Next enter the redirect URL this is specific to the OAuth configuration enter: http://localhost:8080/oauth-authorized/Koverse%20Data%20Platform
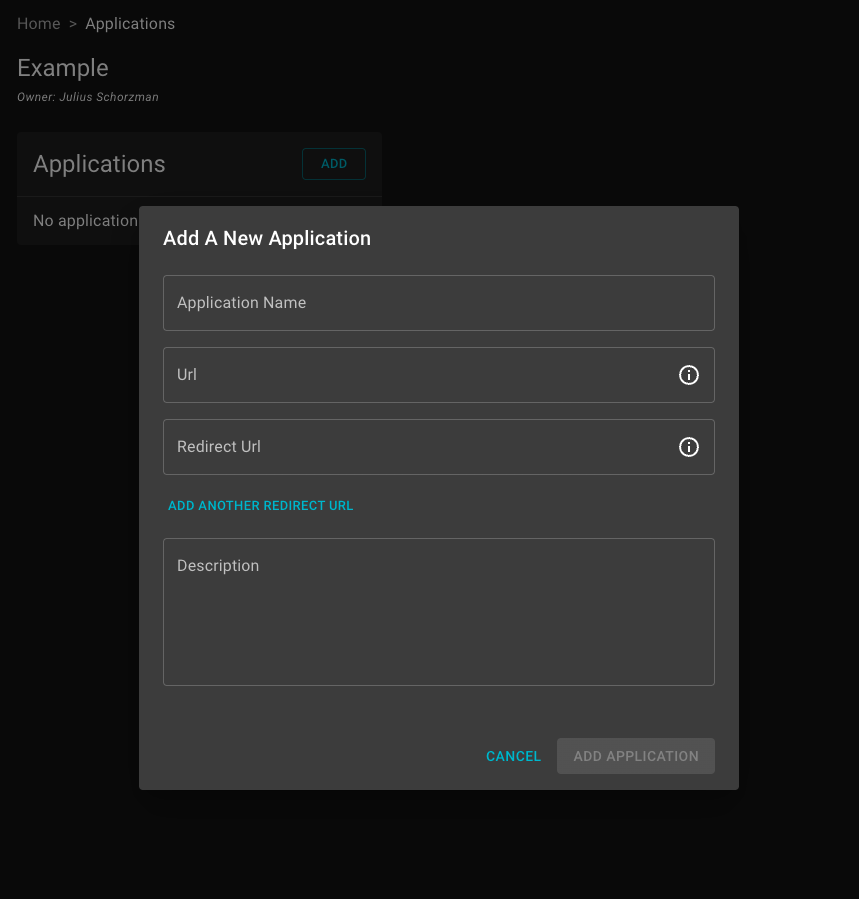
Once the application details are entered, select Add Application this will take you to the application details window that offers further configuration options such as selecting which users can access the application. This can be left alone for now, as what we care about are the Application Secrets at the bottom of the window.
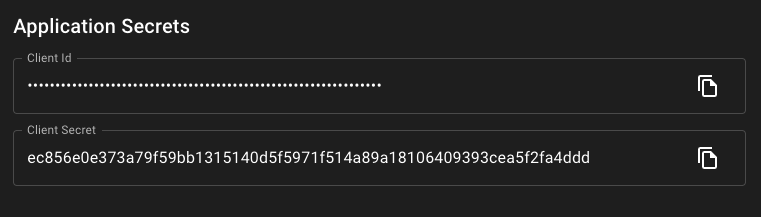
Open the airflow repository cloned earlier in a text editor of your choice. We will be pasting these two configuration values in as environment variables. Open up .env within the airflow folder and paste your client ID and secret into the KDP_CLIENT_ID and KDP_CLIENT_SECRET variables.
You’re now ready to restart the Airflow containers and sign in via Koverse. Go ahead and run
docker-compose up
This will start up the containers and add in the newly added configuration into the Airflow containers. Go ahead and visit localhost:8080 again. Click Sign in with Koverse Data Platform and enter your workspace credentials.
Next, You will be prompted to “Allow Access” to Airflow with your Koverse account. Continue and you should see the airflow page pre populated with a couple of our example dags.
First DAG Run
With Airflow up and running we’re now ready to run our first workflow! For this example we’ll be using the sample_csv_etl DAG. This DAG takes a CSV from Github, stages it locally, and then uses python to load the data via the Koverse write API.
Before we can run it there is one small change within the DAG. Within Koverse there are unique identifiers for each dataset that is created. To run any of the API requests against Koverse we’ll need to grab that ID. Go ahead and go back to the dataset created earlier in this tutorial and grab the dataset ID.
Next open up your text editor again and in the /dags folder within the Airflow example open up etl.py, there are a couple global variables on Lines 10, 11, 12 and this file, In particular we care about DATASET_ID this is what tells Airflow where to write the data that we’re pulling in. On line 11 update the string in dataset ID to your new dataset ID:
DATASET_ID = 'CHANGEME'
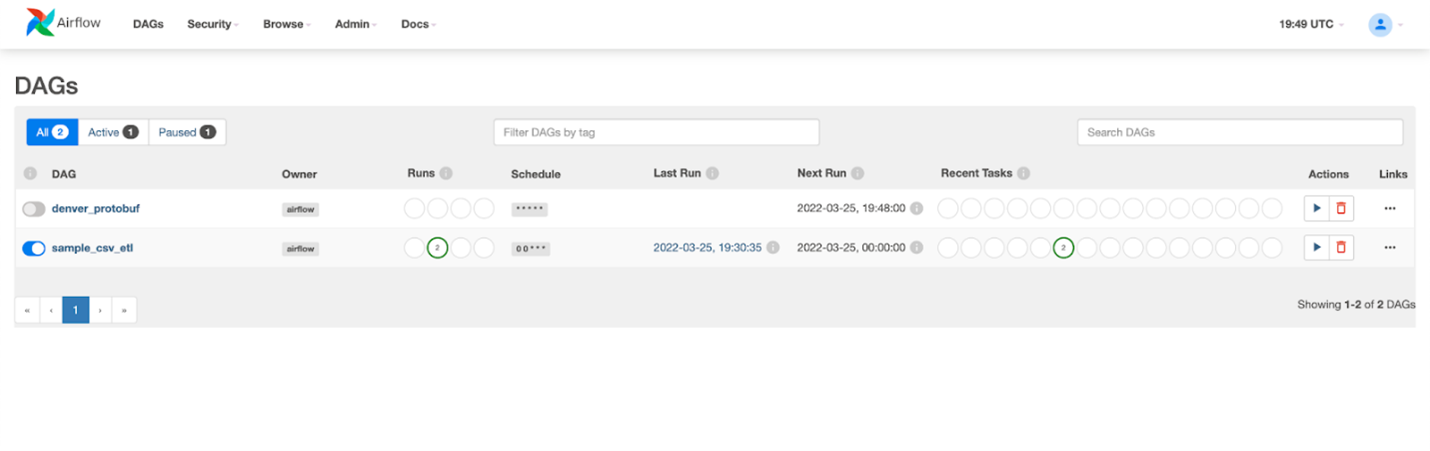
Hit save, Airflow will automatically pick up changes to your dags within this folder. Navigate back to the dags window and refresh. Now we’re ready to trigger our dag.
Go ahead and turn the dag on with the toggle on the left, and push the play button.
![]()
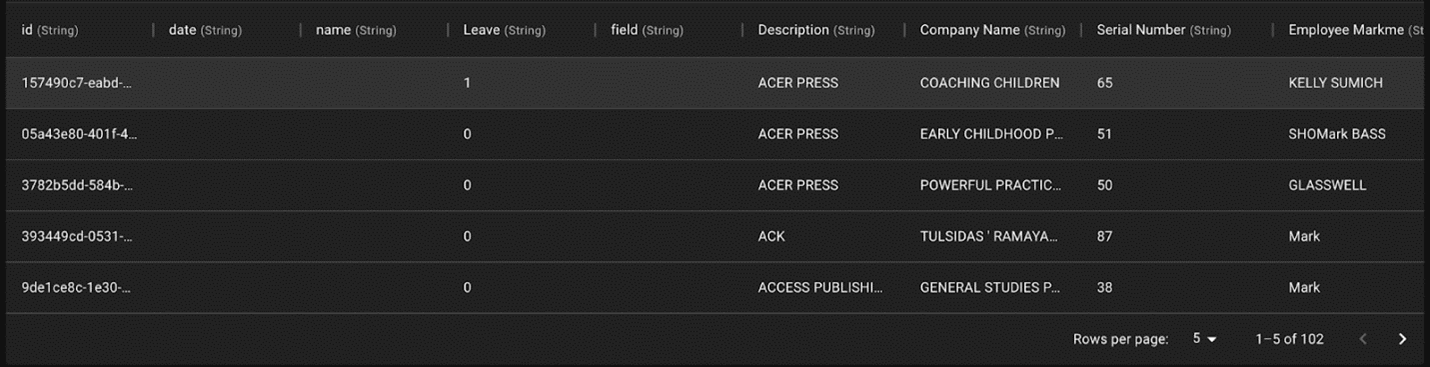
This will execute the dag. Head back over to the dataset you created within Koverse and there should be some employee data loaded into your dataset.
Congratulations! You just successfully downloaded a CSV from the internet and loaded that via Airflow into Koverse. In the next examples we’ll briefly go over a couple of the sample workflows that we’ve included in the repository. This should give you the building blocks to begin prototyping your own workflows on top of Koverse.
Example DAGs
Read live-updated transit data.
You can do so using a real-time Google Transit API as the data source, Airflow as the data-pipelining tool, and Koverse as the data store.
In the listed DAGs, you should see denver_protobuf. This is for the live Denver transit feed, which is served as a protobuf file that updates on an incremental basis.
First, create an empty Dataset in Koverse, making note of the dataset ID. By setting the DATASET_ID variable on line 13 to the Koverse dataset ID in the corresponding DAG file read_google_transit_to_kdp4.py, you can read from the Google Transit API, normalize the data, and write it to a Koverse dataset on a schedule set by Airflow. At the end, activate the DAG.
Putting It All Together: Parsing Protobuf Metro Data Into Koverse
The incoming Denver protobuf file doesn’t fully flush out duplicates from the previous updates, so we can clean these up and set a route update column to map a route to sequential values for tracking individual route paths more easily later on.
In the clean_transform_kdp4_google_transit.py file, modify line 11 for ORIGIN_DATASET_ID to the dataset that was originally written to. Create a new dataset, which the data will go after being cleaned, modifying line 12 CLEANED_DATASET_ID, and create another new dataset, which will store the data after we have calculated the route sequence mapping, modifying line 13 DESTINATION_DATASET_ID. At the end, activate the DAG.
Next Steps
To recap, we’ve set up a Koverse account, created a local running version of Apache Airflow, connected that to the Koverse authentication system, and set up your first DAGs that interact directly with some core features of Koverse. The examples that were provided in this document are a jump off point to start creating your own workflows on Koverse. To take it a step further you could try and hook up one of your own data sources into Airflow to handle ingesting data on a schedule. Another option would be to deploy the Airflow containers on a larger system in your internal network and then reconfigure the authentication to accept requests from there instead of locally. If you have any suggestions or questions to improve this document feel free to reach out at garrettcriss@koverse.com
Running a jupyter notebook as a DAG with Papermill
To run a jupyter notebook as a DAG, refer to the papermill_example.py, which consists of a python script that defines a DAG, which uses the PapermillOperator to point to the airflow_Test_write.ipynb file in notebooks. For this example, all Koverse functionality is inside the notebook itself. In Cell 2, the DATASET_ID needs to be specified as a Koverse dataset ID.