JupyterHub Integration
This tutorial will introduce using JupyterHub to launch Jupyter Notebooks which contain the Koverse python packages. We’ll walk through getting started with our JupyterHub Docker Compose, configuring the setup to allow JupyterHub to authenticate via Koverse and then running some example notebooks to get an idea of the data engineering and visualization capabilities, while using the Koverse Data Platform.
Prerequisites
This tutorial assumes a working understanding of Docker, Docker-Compose, Jupyter Notebook, and Python to fully complete. In addition, to run these examples you will need access to a Koverse Data Platform workspace, and a local development environment capable of running Docker.
Getting Started
To get started clone our repository for Jupyterhub here: https://github.com/Koverse/example-projects/tree/main/jupyterhub This repository contains a couple example notebooks in the examples folder, and the necessary configuration to allow Koverse to connect via OAuth to JupyterHub in the jupyterhub_config.py file. There is a Dockerfile that will allow you to install dependencies that are needed by the authentication flow and example notebooks currently in the examples directory.
At the moment, Koverse python client and connector packages are hosted on GitHub. In the JupyterHub repo cloned above, the Koverse python client and connector packages are zipped and installed via pip in the Dockerfile. This is something that could change in the future if the Koverse package(s) are pushed up to PyPi, in which case the zip files would be removed and the install commands in the Dockerfile would be altered. Let’s build the container with the following docker build command, tagging the image as koverse/jupyterhub.
docker build -t koverse/jupyterhub
After building the image, use docker-compose to start JupyterHub.
docker-compose up
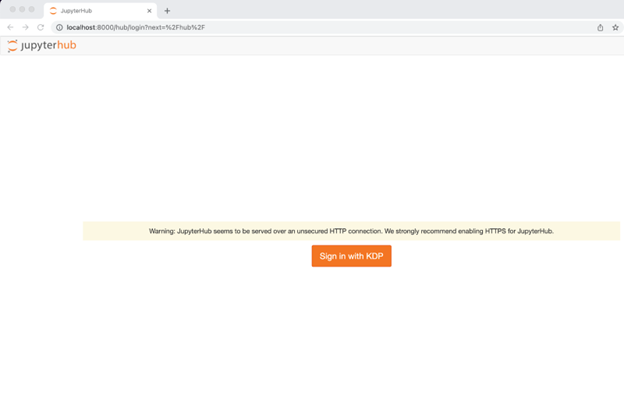
The JupyterHub container will be started in a non-detached environment piping the logs into your terminal. To verify everything is working properly navigate to localhost:8000 and you should see a login screen asking you to authenticate with Koverse.
In the next section we will complete the connection within Koverse which will allow you to log in with your Koverse account. For now stop the container with Ctrl+C in order to set a couple of crucial environment variables in the next section. Go ahead and run:
docker-compose down
Connect JupyterHub to Koverse
In the following section we will walkthrough:
- How to create the first workspace in Koverse.
- Creating a base dataset to read/write into.
- Intro to the applications page and the initial setup for OAuth with JupyterHub.
- Sign up for Koverse and create your first workspace.
If you already have a Koverse account and a workspace feel free to skip to the next section. Otherwise take a moment to sign up for the free trial and create your first workspace.
Create a dataset
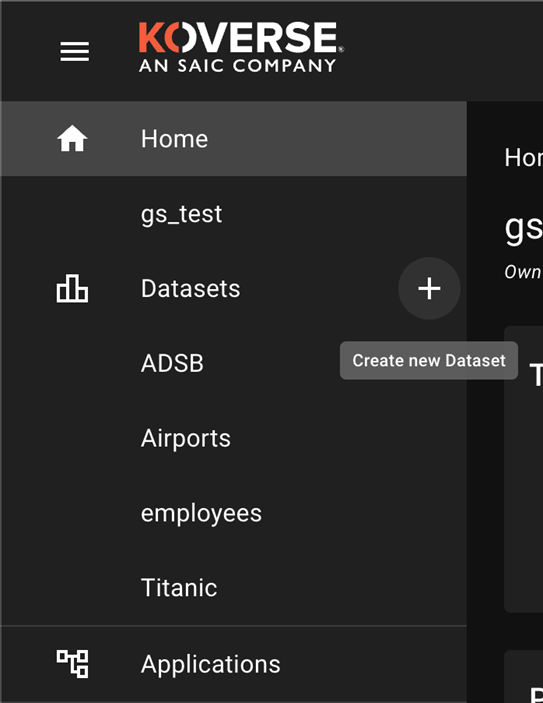
The first step will be creating a new dataset that we can use to load data in via Airflow, go ahead and select the plus sign on the left hand menu, you will be prompted to give it a name and a short optional description of the data you will be loading in.
Once the dataset is created grab your dataset ID from the URL and save this as we’ll need it in a later step to run against airflow.

Creating your first Koverse Application
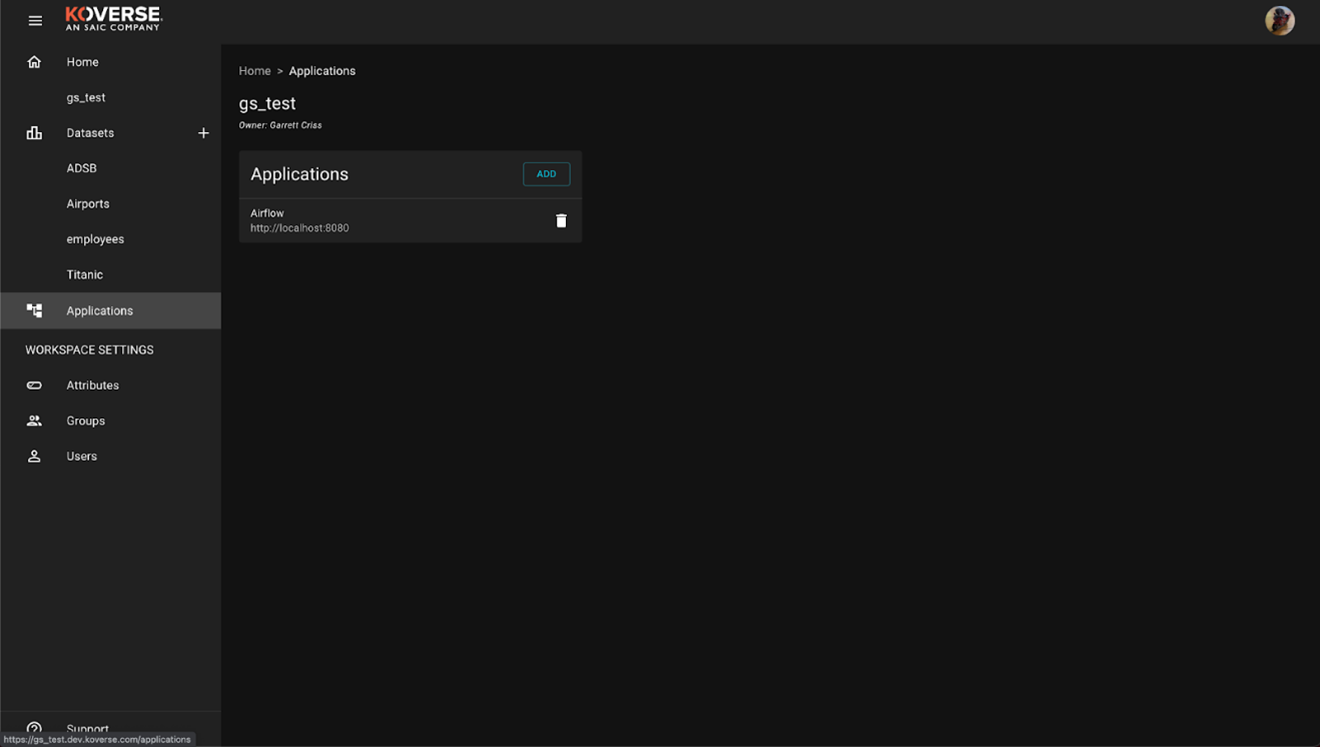
Next navigate to the Applications tab, here we will configure Koverse to connect to the Oauth implementation in the Airflow repository.
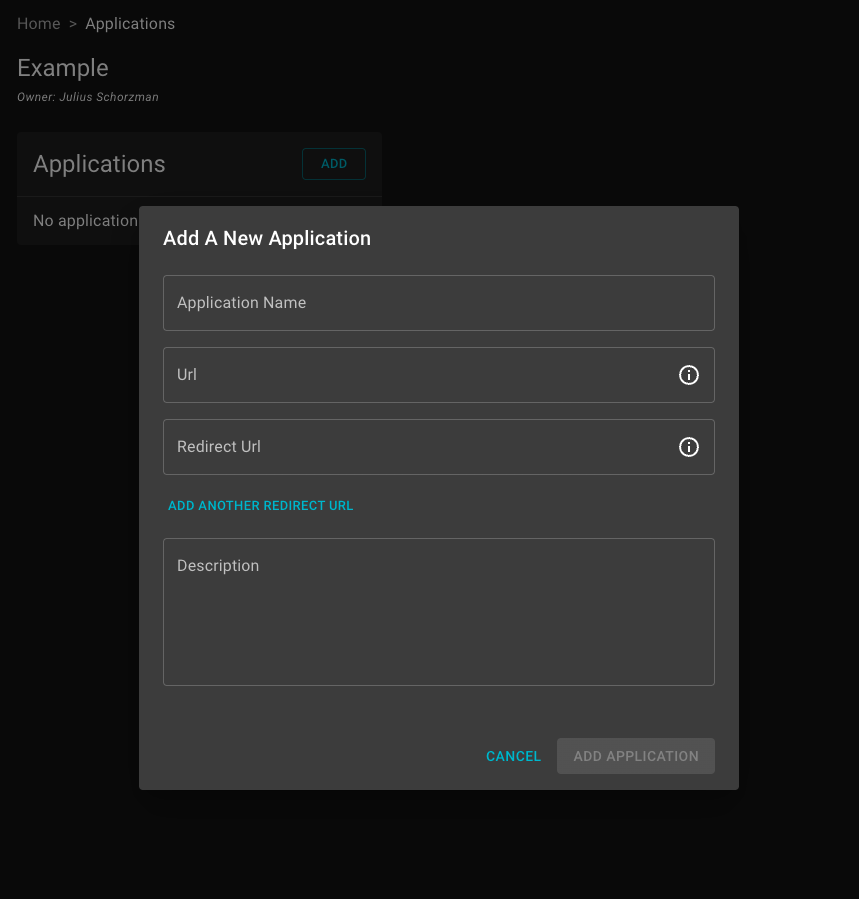
Next select Add, this will open up a dialog window. Give your application a descriptive name, Airflow will work here. Next the URL of the where the application is hosted. In this case locally, enter http://localhost:8080 Next enter the redirect URL this is specific to the OAuth configuration enter: http://localhost:8080/oauth-authorized/Koverse%20Data%20Platform
Once the application details are entered, select Add Application this will take you to the application details window that offers further configuration options such as selecting which users can access the application. This can be left alone for now, as what we care about are the Application Secrets at the bottom of the window.
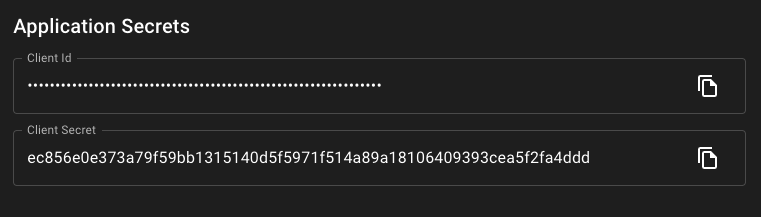
Open the jupyterhub repository cloned earlier in a text editor of your choice. We will be pasting these two configuration values in as environment variables. Open the .env file within the project. Replace values for the G_CLIENT_ID and G_CLIENT_SECRET. Also, if the API urls change over time, this is where they would be updated. These values are all pulled into the jupyterhub_config.py file for use in the authentication process.

You’re now ready to restart the Jupyterhub container(s) and sign in via Koverse. Now the Oauth flow has been given the variables which are necessary to make authentication to Koverse possible. Now we can follow through with building and running the container. Go ahead and run:
docker build -t koverse/jupyterhub .
After building the image, use docker-compose to start JupyterHub.
docker-compose up
This will start up the container and add in the newly added configuration into the JupyterHub containers. Go ahead and visit localhost:8000 again. Click Sign in with Koverse Data Platform and enter your workspace credentials.
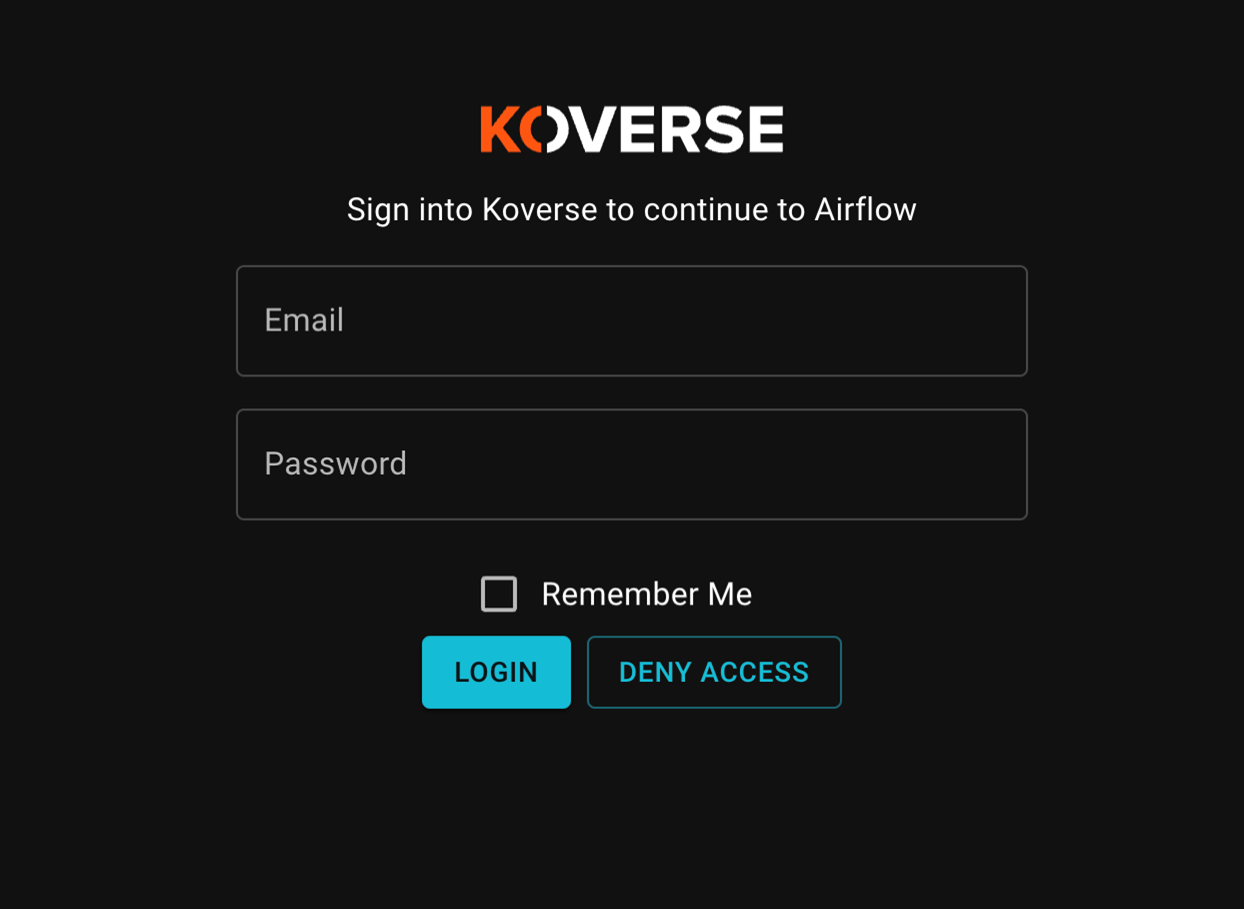
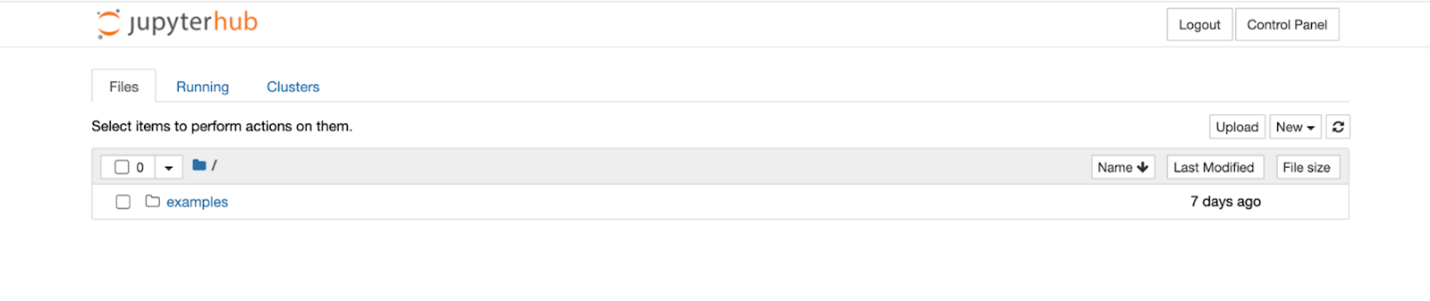
Next, You will be prompted to “Allow Access” to JupyterHub with your Koverse account. Continue and you should see the jupyterhub page and an examples directory.
Running Example Notebooks
With JupyterHub up and running we’re now ready to create and manage our own notebooks, access terminal, and do anything that’s possible in a typical Jupyter Notebooks environment. Walk through the example files to get a feel for the current installations and the Koverse connections created during the process thus far.
Koverse Reading and Writing Flow with Pandas Example Notebook
Go ahead and open up the Koverse Reading and Writing Flow with Pandas Example Notebook in the examples directory. This notebook goes over how to write data into Koverse in various fashions and also how to read data from Koverse. The notebook begins with some helper functions, and directly after these functions you will see the below cells, in which you will need to add your own information where indicated to do so.
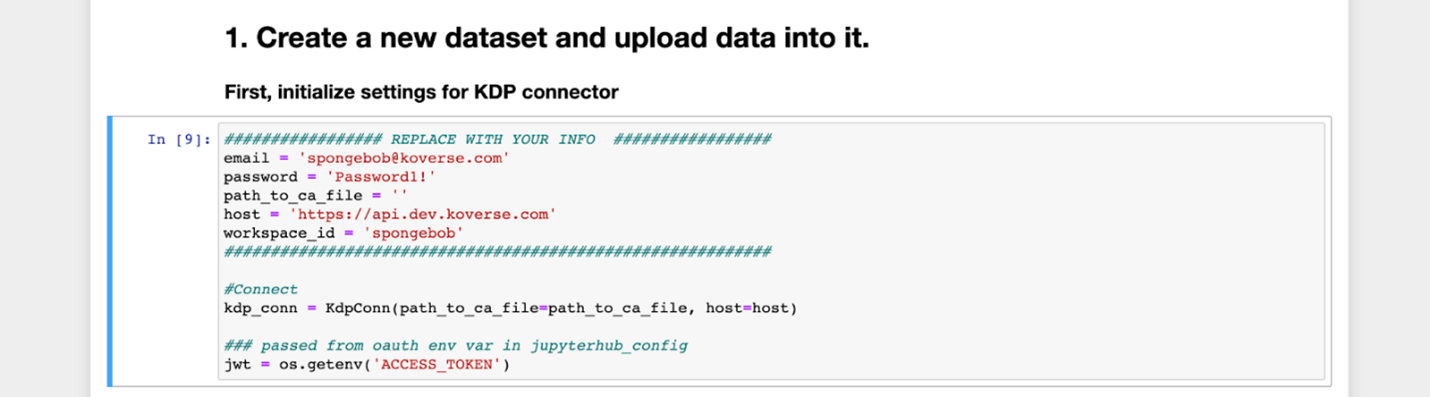
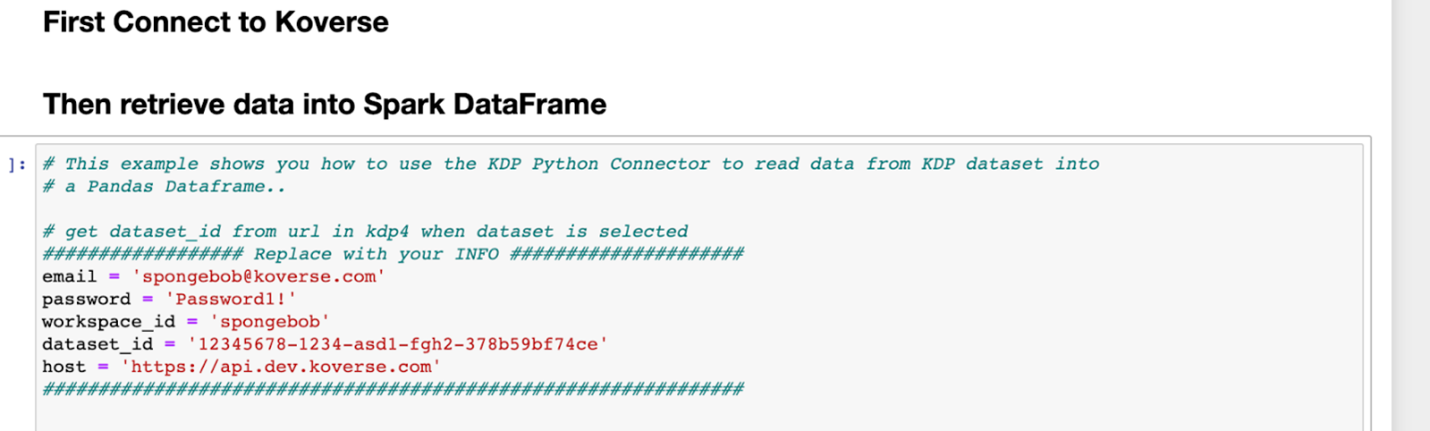
In this cell, the settings for the Koverse connector must be initialized by replacing the email, password, host, and workspace_id fields with those corresponding to the user and workspace which will be used to read from and write to. The ACCESS_TOKEN environment variable is seen being retrieved from python’s OS, as the variable jwt.
After performing necessary normalizations, the write_to_new_kdp function can be called using the cleaned dataset as the first parameter.
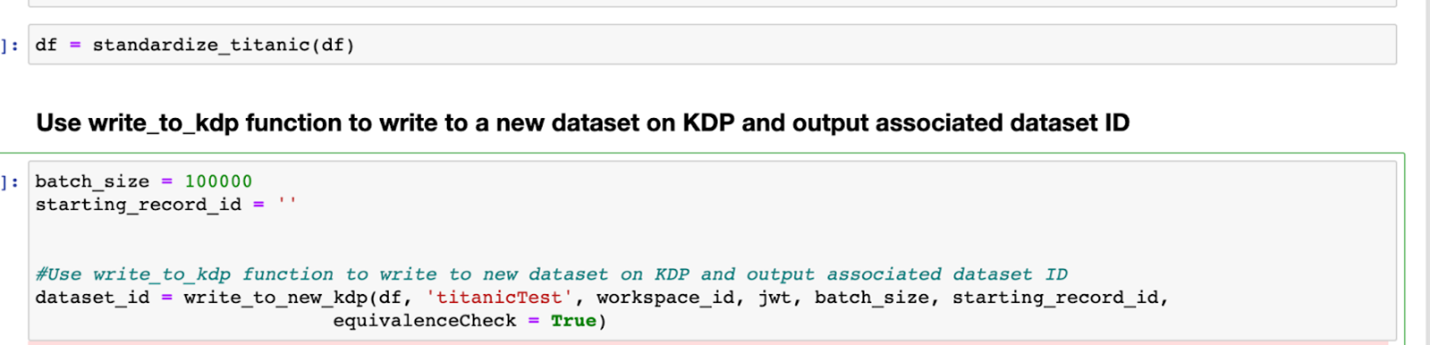
The dataset_id which is created upon write is then utilized to append data to that very same dataset.

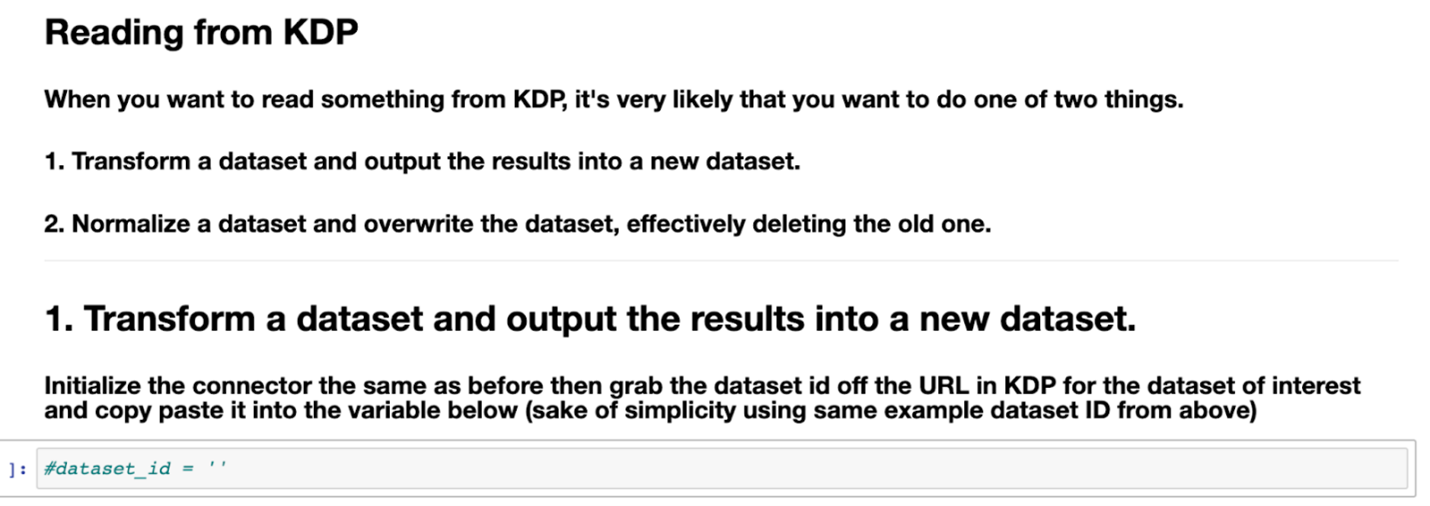
When dealing with an existing dataset, the dataset_id value you saved above could alternatively be used here, just replace the dataset_id value below.

This can also be applied when reading from Koverse, either read from the dataset you just created or replace the dataset_id that is commented out below with an existing dataset in your workspace.
The examples continue to include the overwriting of a dataset which deletes the old dataset. Run the cells in the notebook, playing around with various datasets and take note of the changes which occur on the respective datasets in your Koverse workspace when going through the steps to write to Koverse.
Koverse SparkML Example Notebook
In this example notebook, it is left up to you once again which workspace_id and dataset_id you will be utilizing, so go ahead and change the values where prompted in this cell.
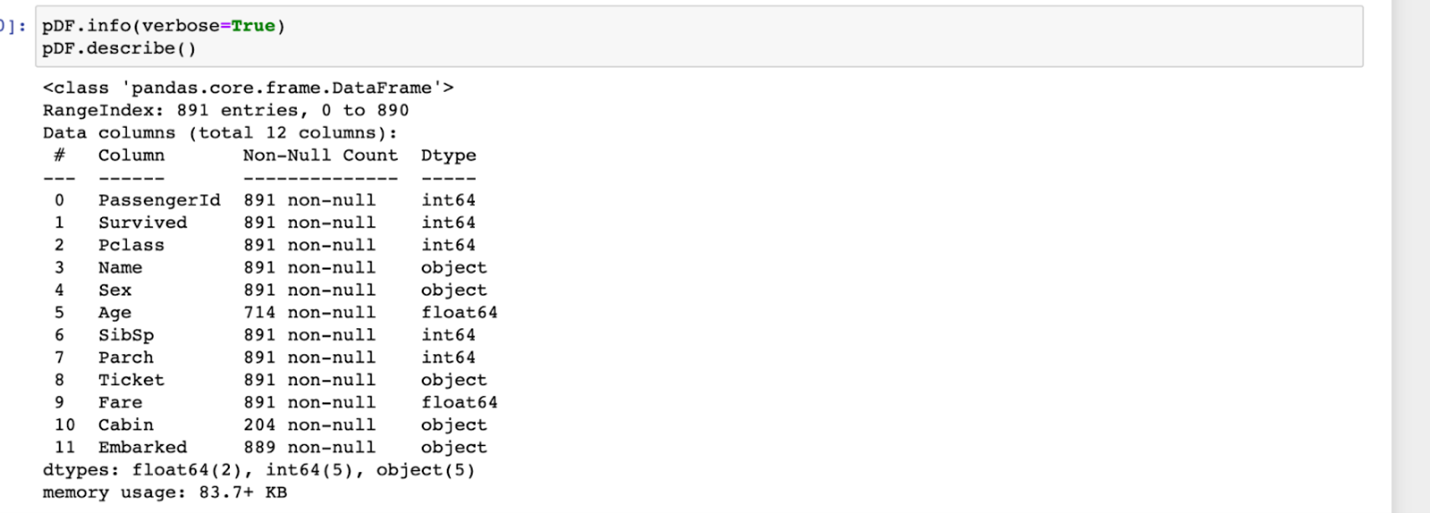
This example notebook makes use of the famous titanic dataset. If you would like to follow along in reading the titanic data from Koverse, you must first make sure that you upload the titanic dataset into your Koverse workspace. The examples in this notebook are based off of https://towardsdatascience.com/predicting-the-survival-of-titanic-passengers-30870ccc7e8 The intention of this notebook is to provide more visualizations and data exploration options to show the extent of what can be done in this JupyterHub docker container, while the previous example notebook went deeper into the various Koverse connections.

You can also simply read in the titanic.csv file in the examples directory and skip down to the section involving data exploration using pandas.
Creating a Persistent Workspace
One thing to note is that with DockerSpawner, the home directory is not persistent by default, so some configuration would be required to move beyond this demo JupyterHub deployment. In order to establish a persistent user workspace, the following can be uncommented and further customized in jupyterhub_config.py:

The addition of volume mapping for DockerSpawner is required for persistence. Here, a directory with any personal notebooks is created in addition to the shared non-persistent examples directory. This is an example of a simple isolation of user files, but this could be taken several steps further.
Next Steps
To recap, we’ve set up a Koverse account, created a local running version of JupyterHub, connected that to the Koverse authentication system, and ran through some examples that interact directly with some core features of Koverse. The examples that were provided in this document are a jump off point to start creating your own jupyter notebooks utilizing python connections to Koverse. The Koverse Reading and Writing Flow with Pandas Example Notebook example demonstrates reading and writing to Koverse. The Koverse SparkML Demo notebook makes use of pyspark and shows off some ML and visualizations. To take things a step further, you can create your own datasets in Koverse and your own python solutions as personal notebooks by enabling your persistent workspace. If you have any suggestions or questions to improve this document feel free to reach out at hayleyhall@koverse.com