Dataiku Connector User Guide
Overview
The Dataiku Connector is used to connect the Dataiku Data Science Studio (DSS) with Koverse.
Installation
Prerequisite for using the Dataiku Connector is the installation of Dataiku (DSS). Installation instructions are available below:
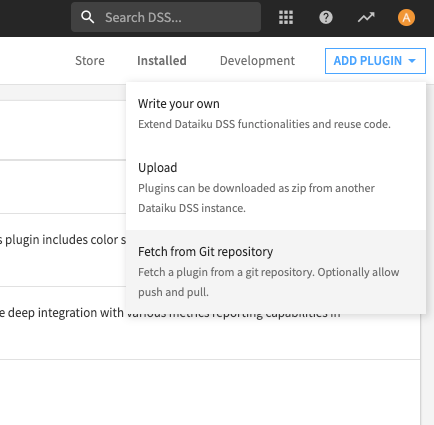
The plugin can be installed from the Add Plugin page in Dataiku DSS:
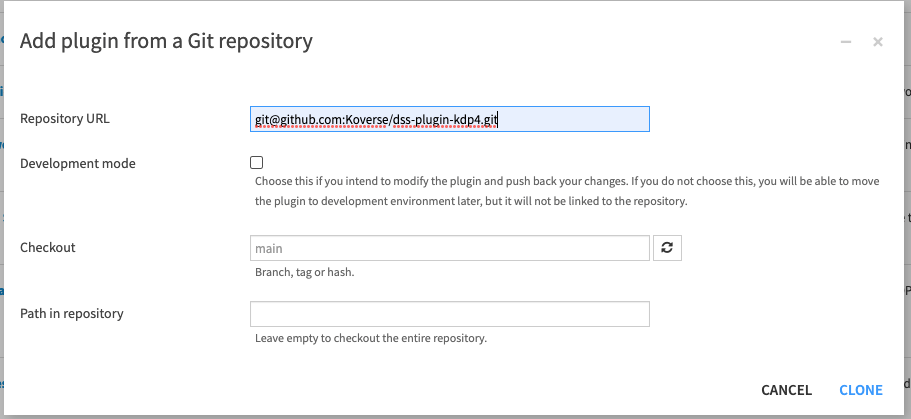
Repository URLs:
git@github.com:Koverse/dss-plugin-kdp4.git
or
https://github.com/Koverse/dss-plugin-kdp4.git
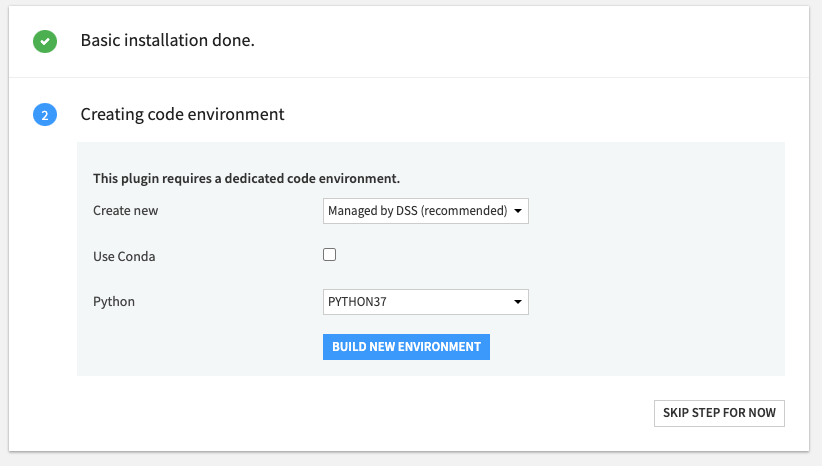
The next step is to create a code environment for the plugin, which installs needed dependencies:
kdp-python-connectorkdp-api-python-client
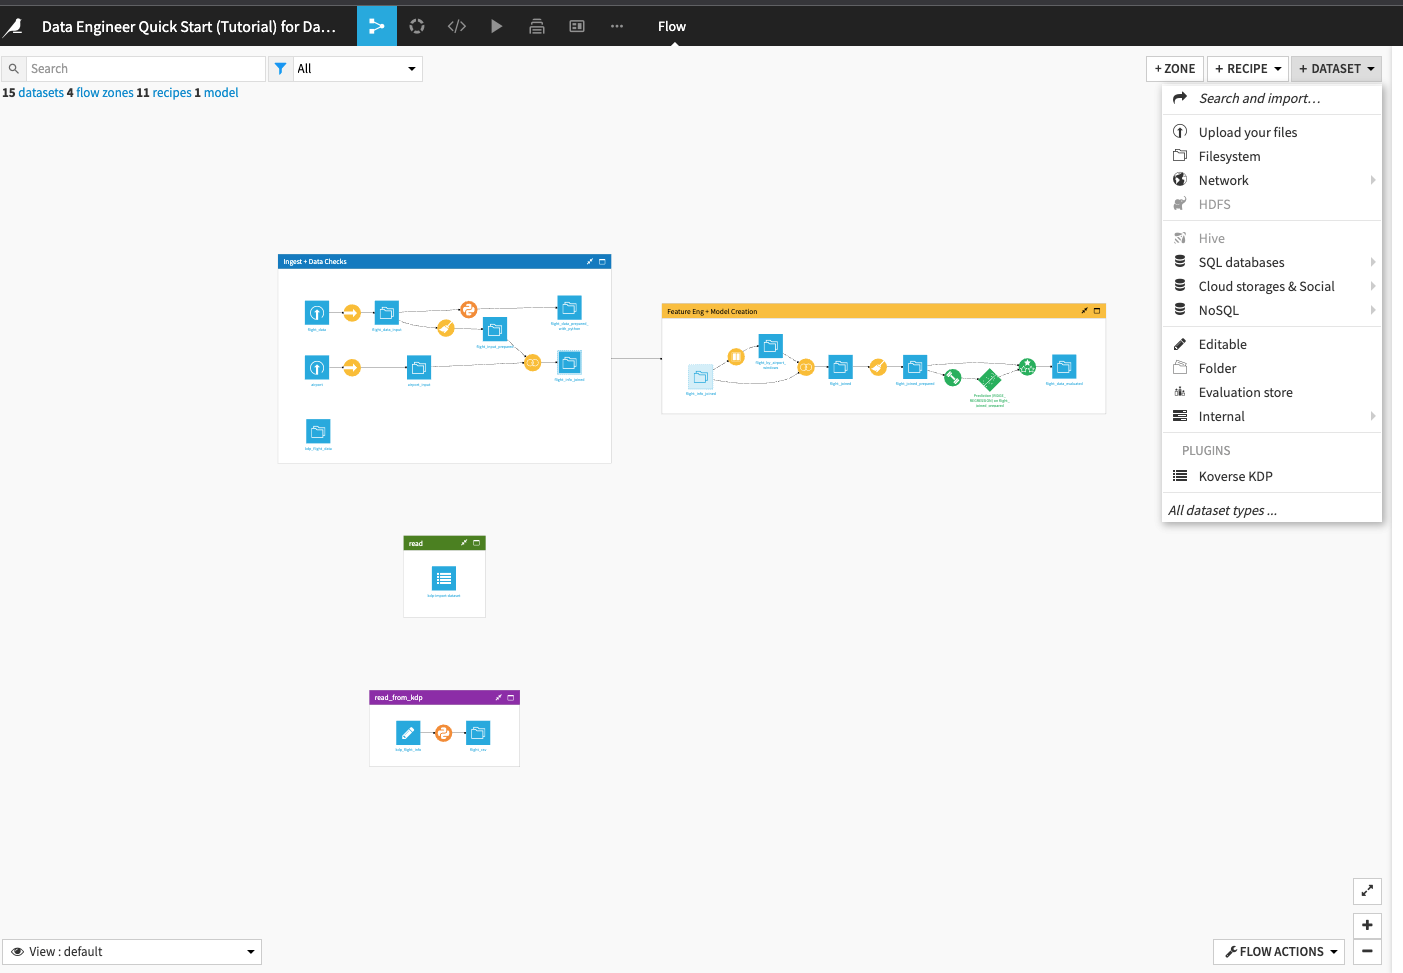
After installation of the plugin, The Koverse plugin will be accessible from the DATASET menu of the Flow in Dataiku DSS. Example:
Create Dataiku Preset
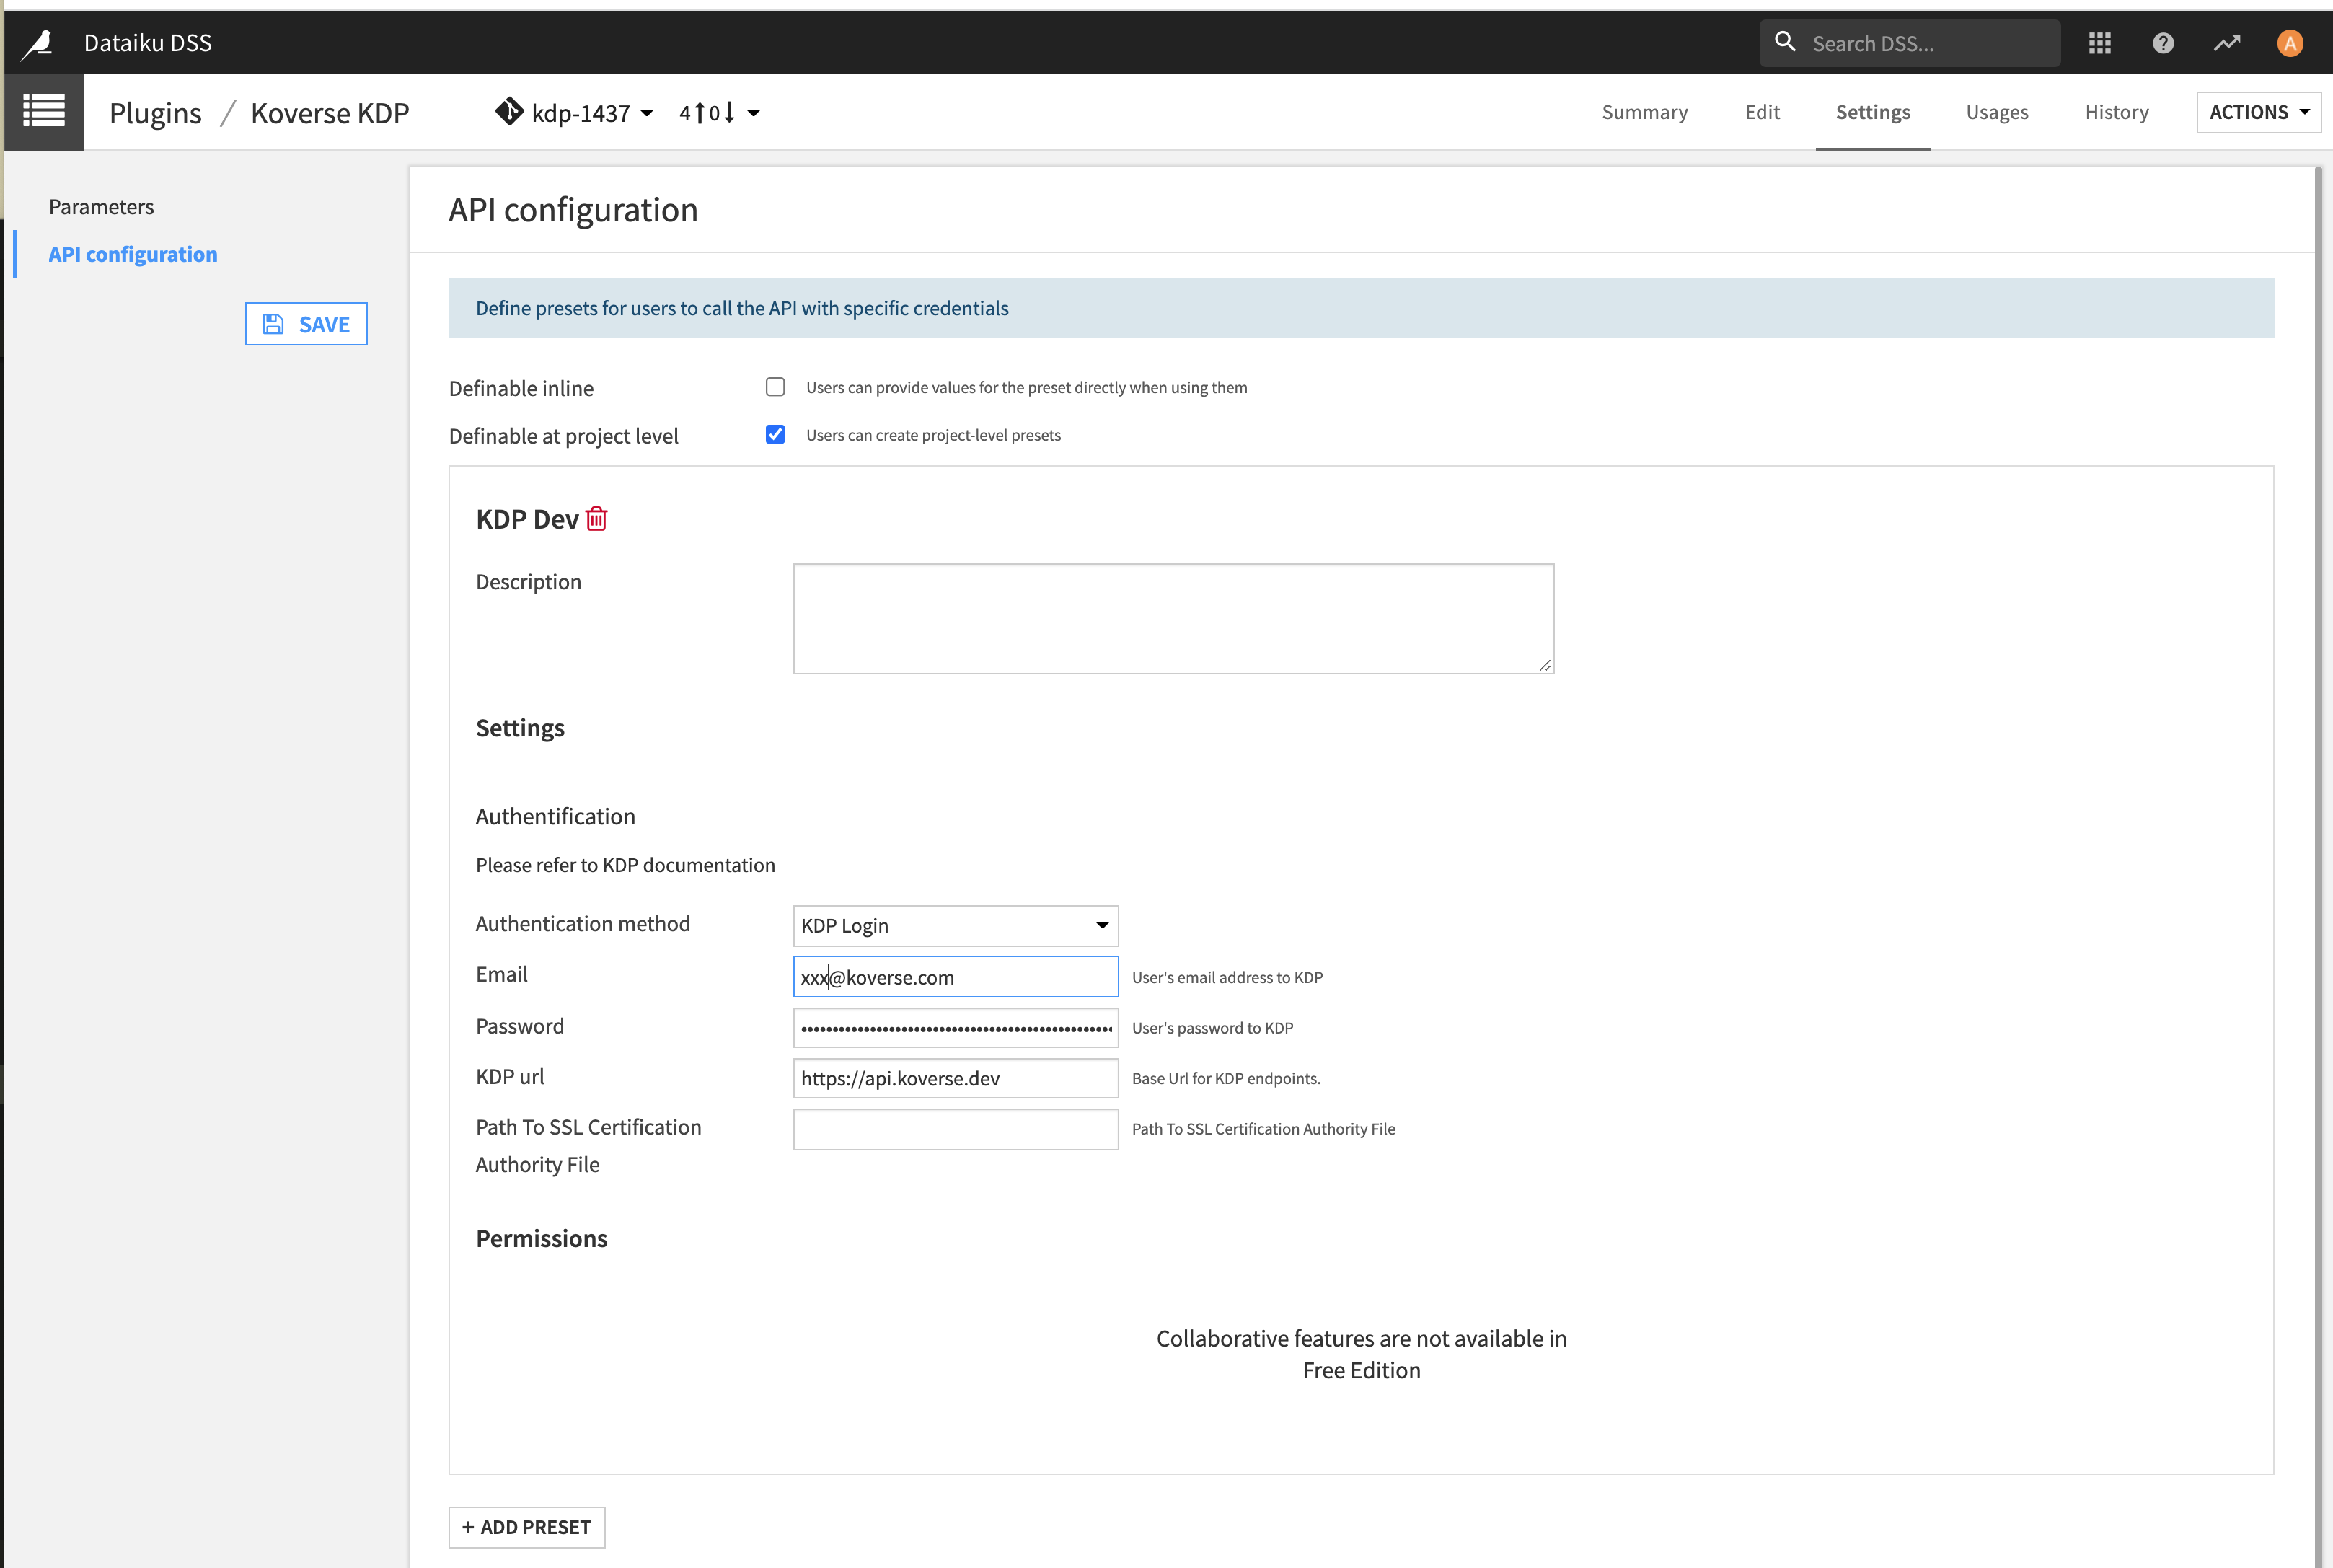
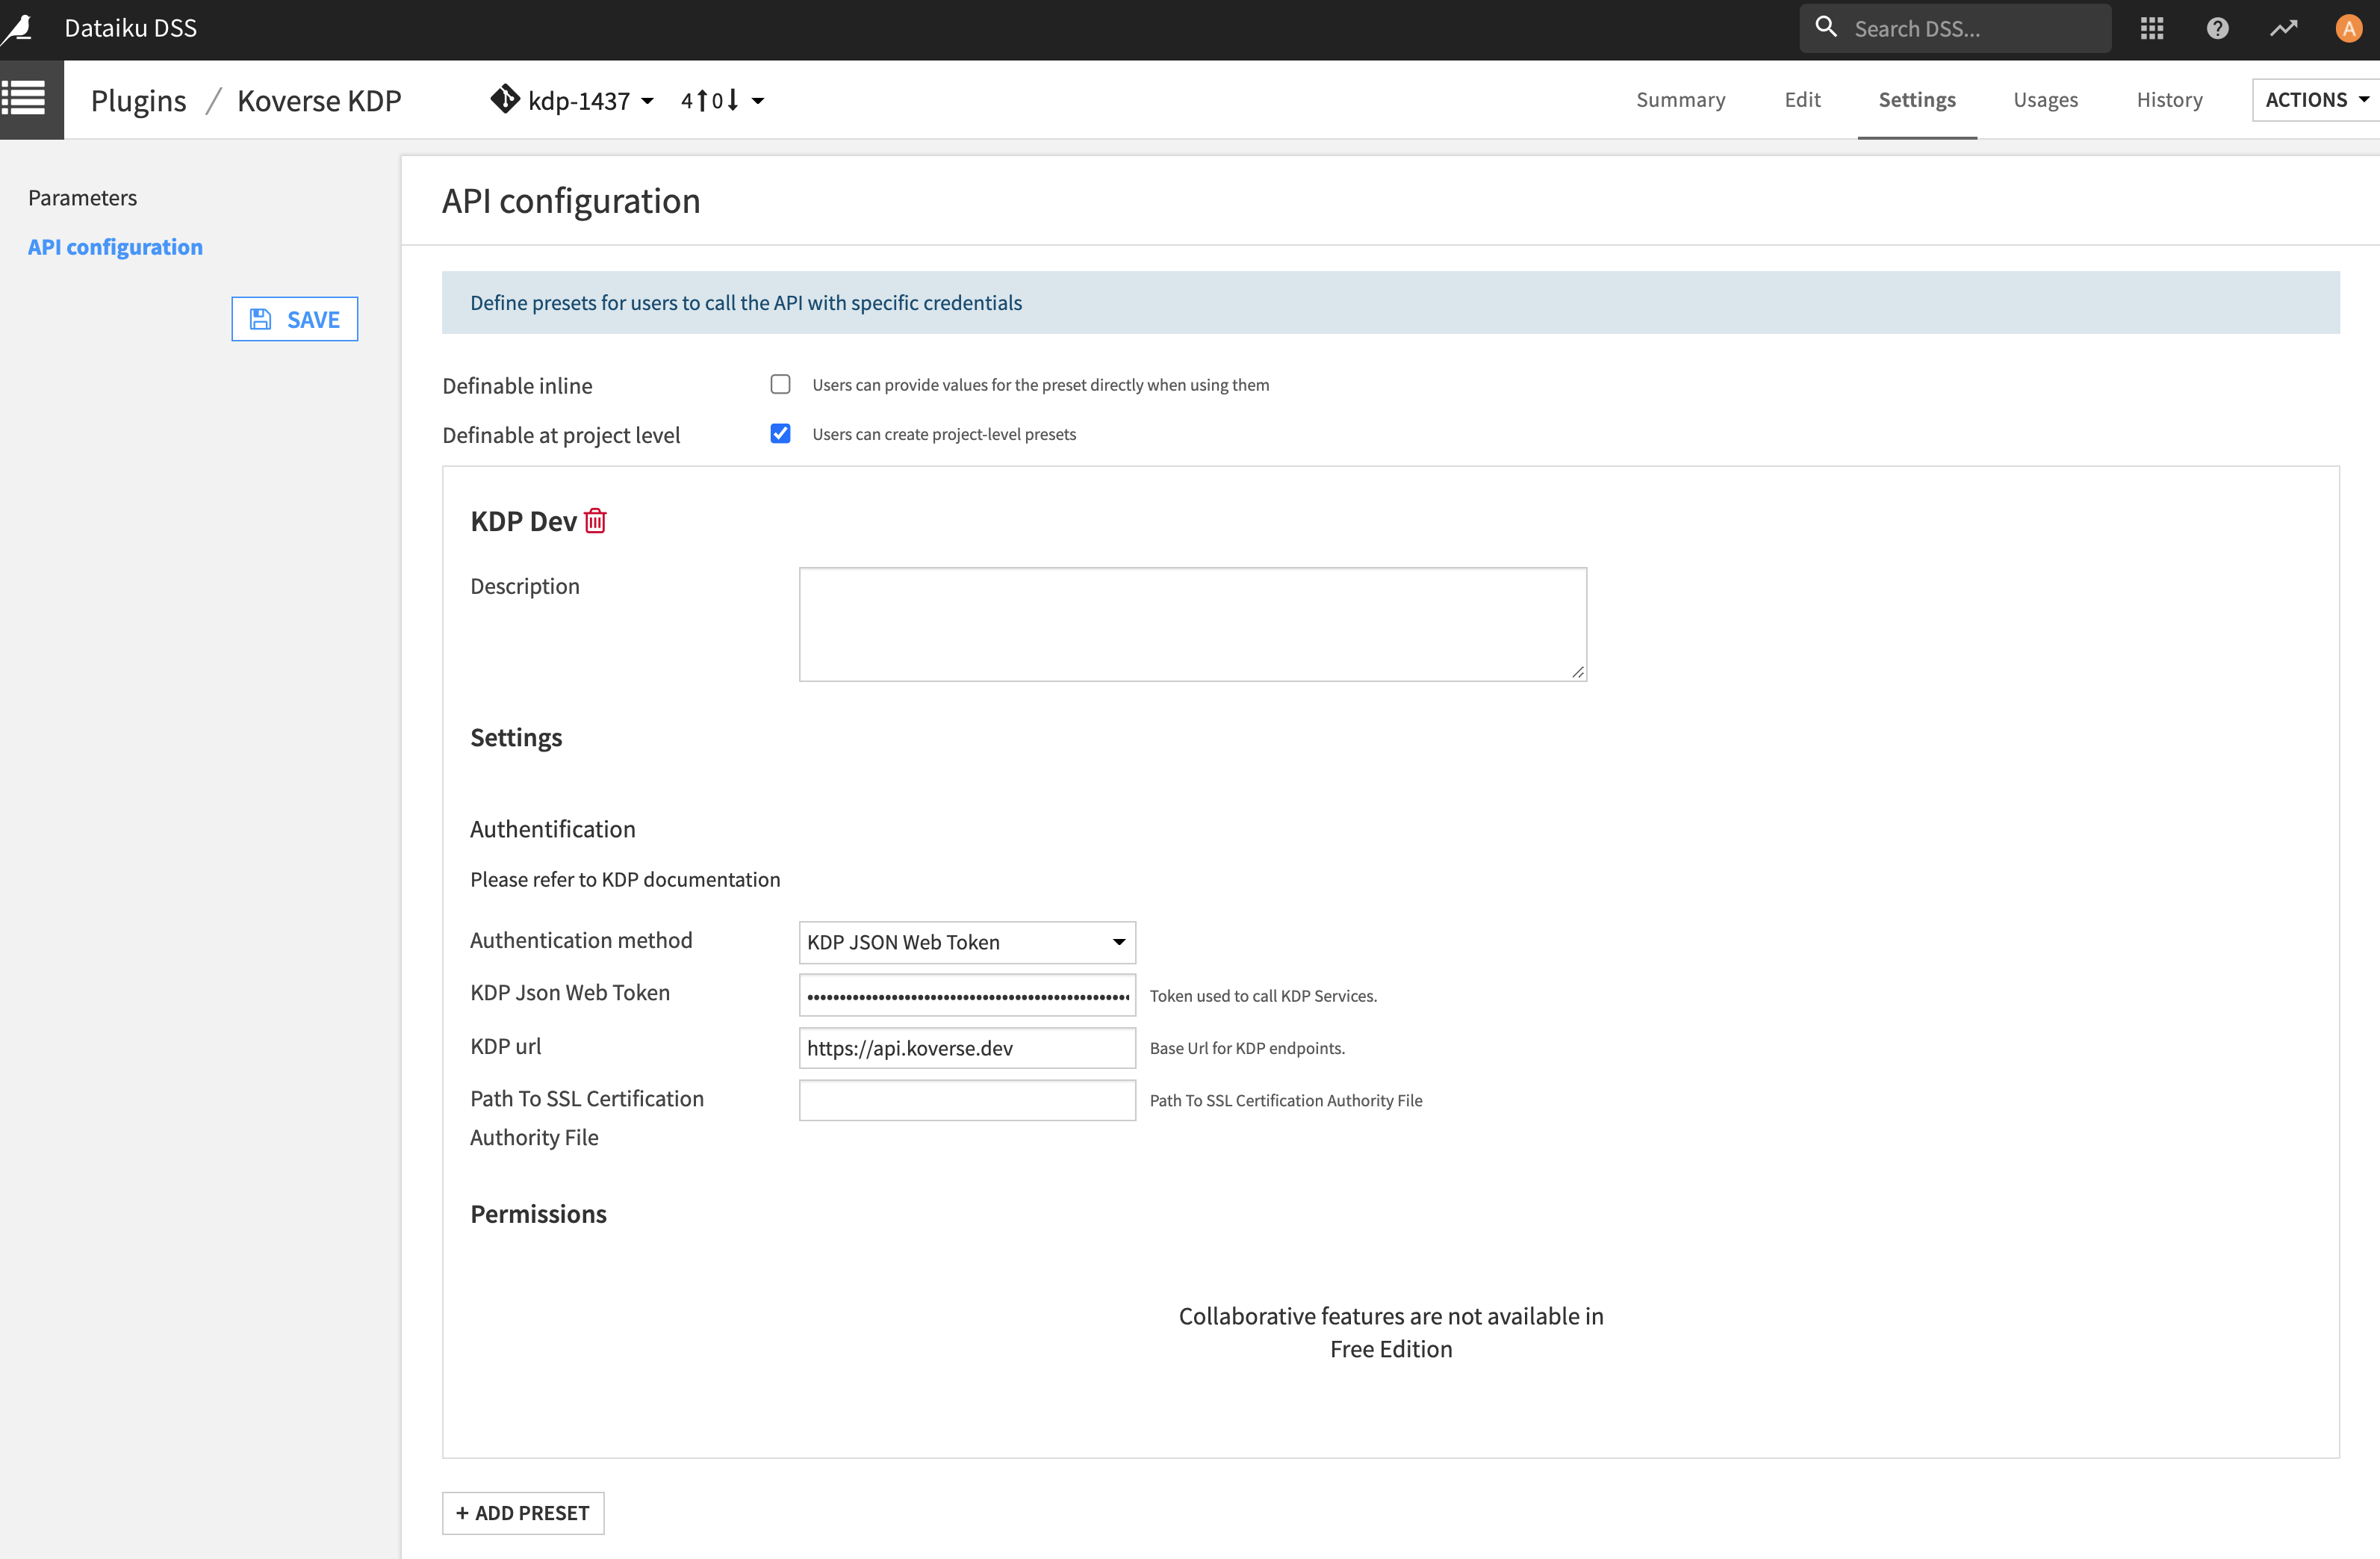
Under the Settings tab, create a preset for API configuration.

There are two supported authentication methods, basic_login and json web token. The Koverse plugin will use the method you choose for authentication when connecting to Koverse.
Basic Login
Koverse JSON Web Token
Read/Write Data from Dataiku DSS to Koverse
Select the Koverse Dataset which is a Dataiku custom dataset for reading and writing data to Koverse.

Provide Required Parameters and Name for the Dataset
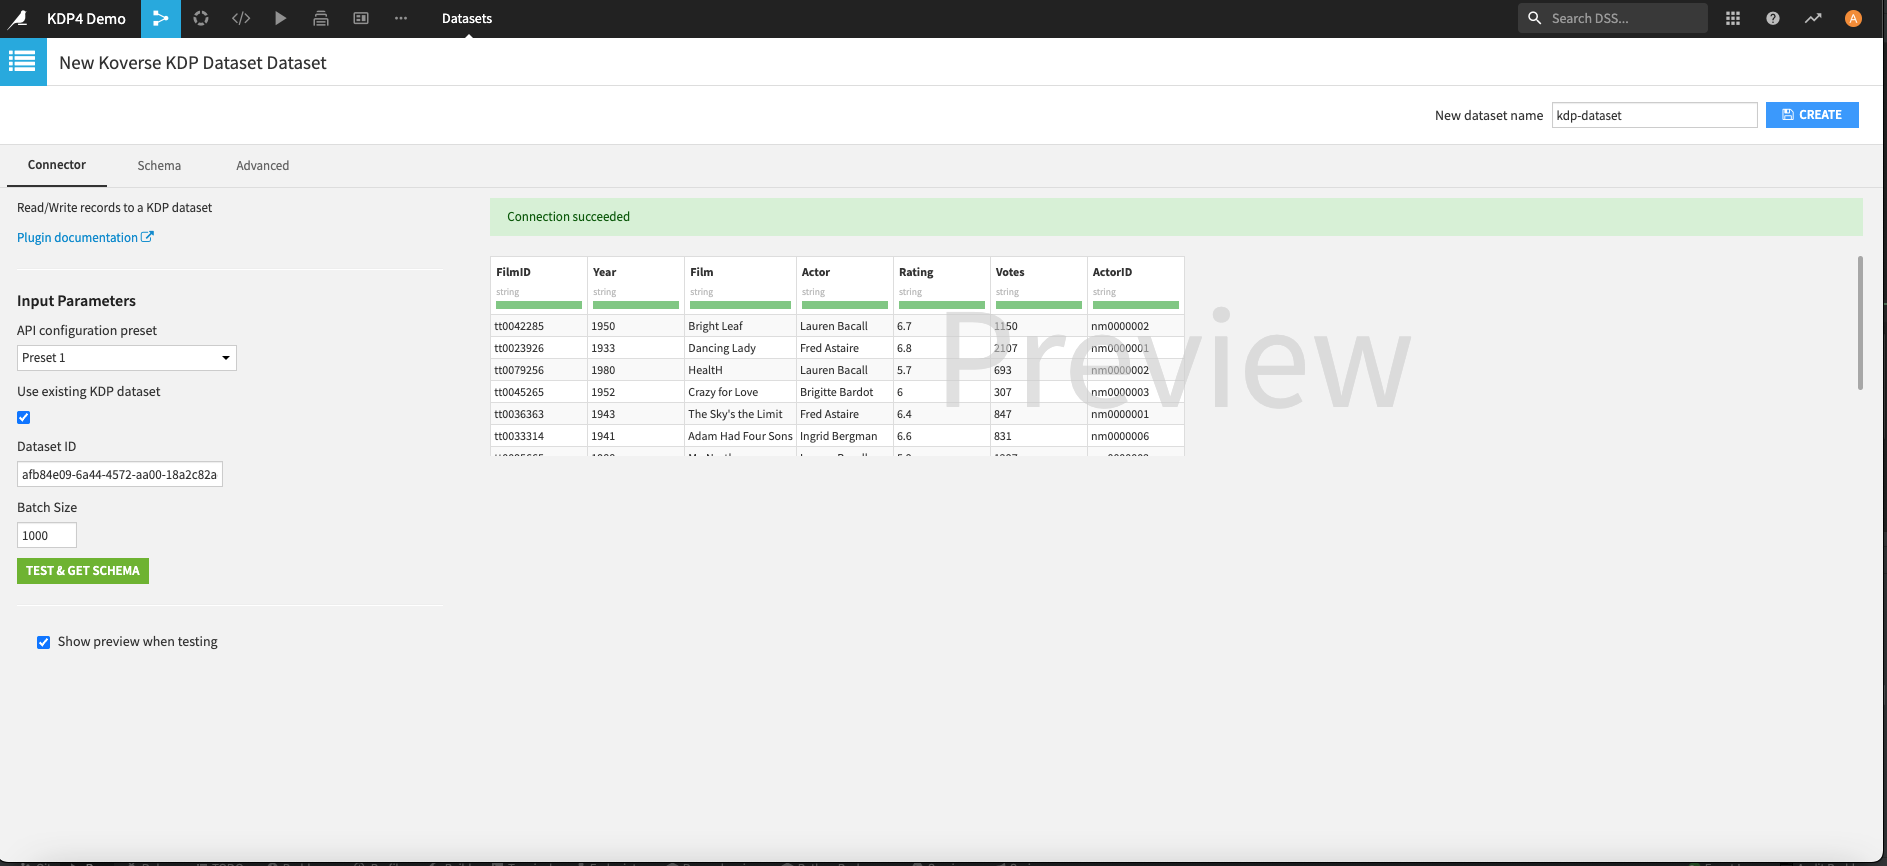
When using an existing Koverse dataset, the existing data can be previewed:
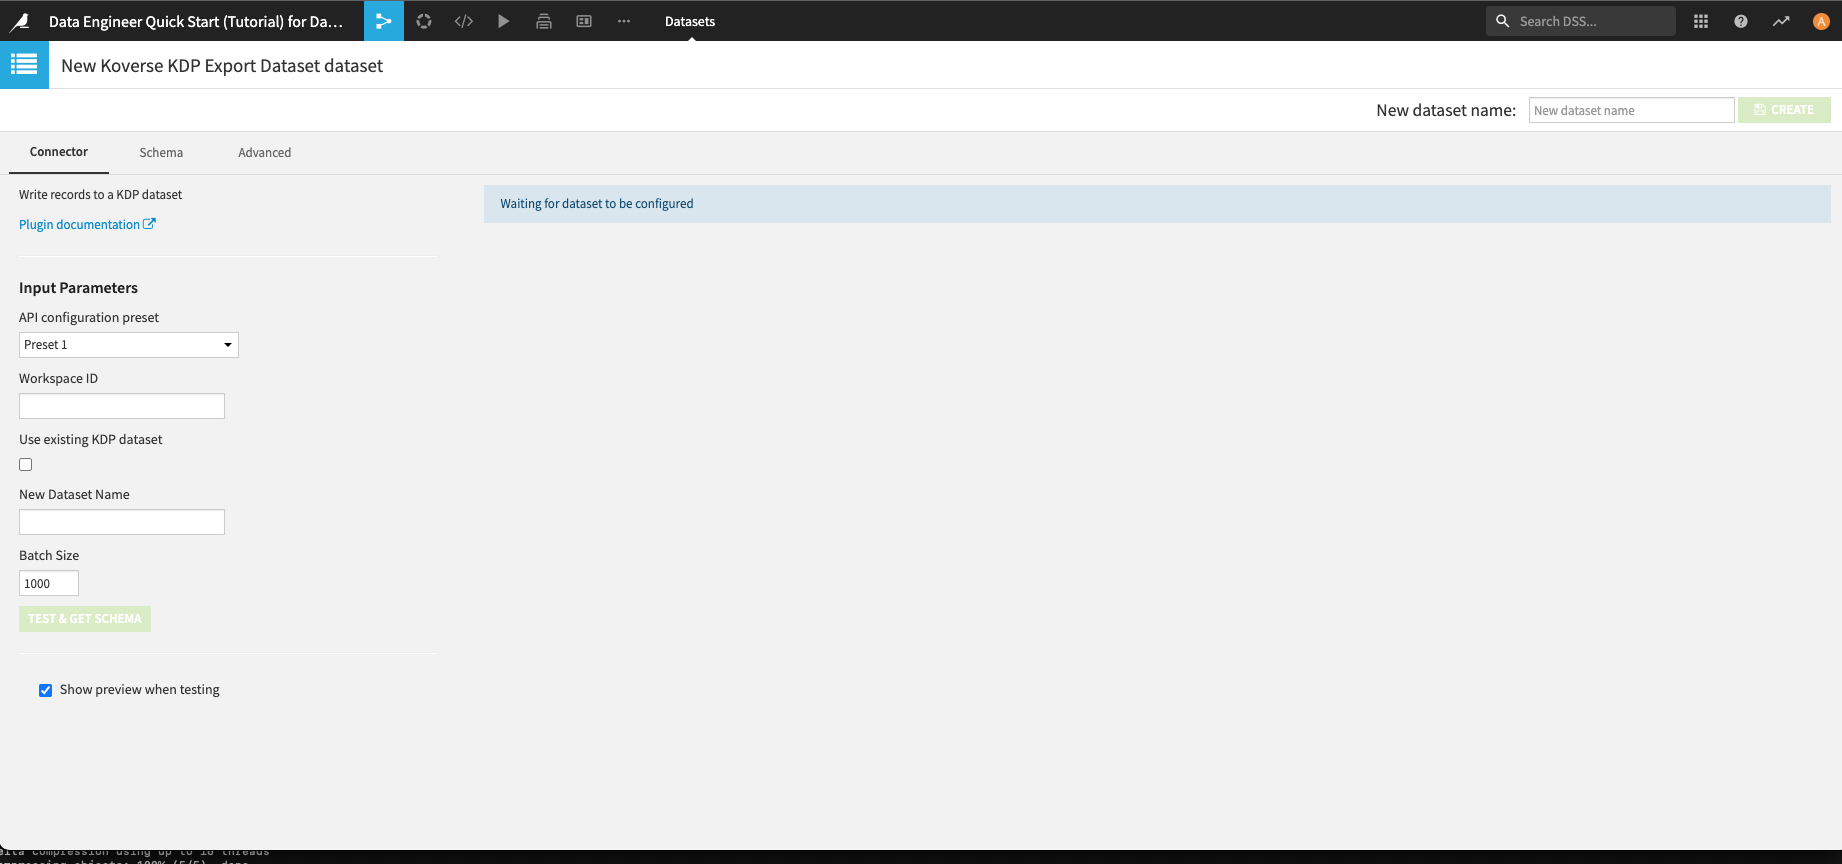
When using the dataset to create a new Koverse dataset, you can provide the dataset name.
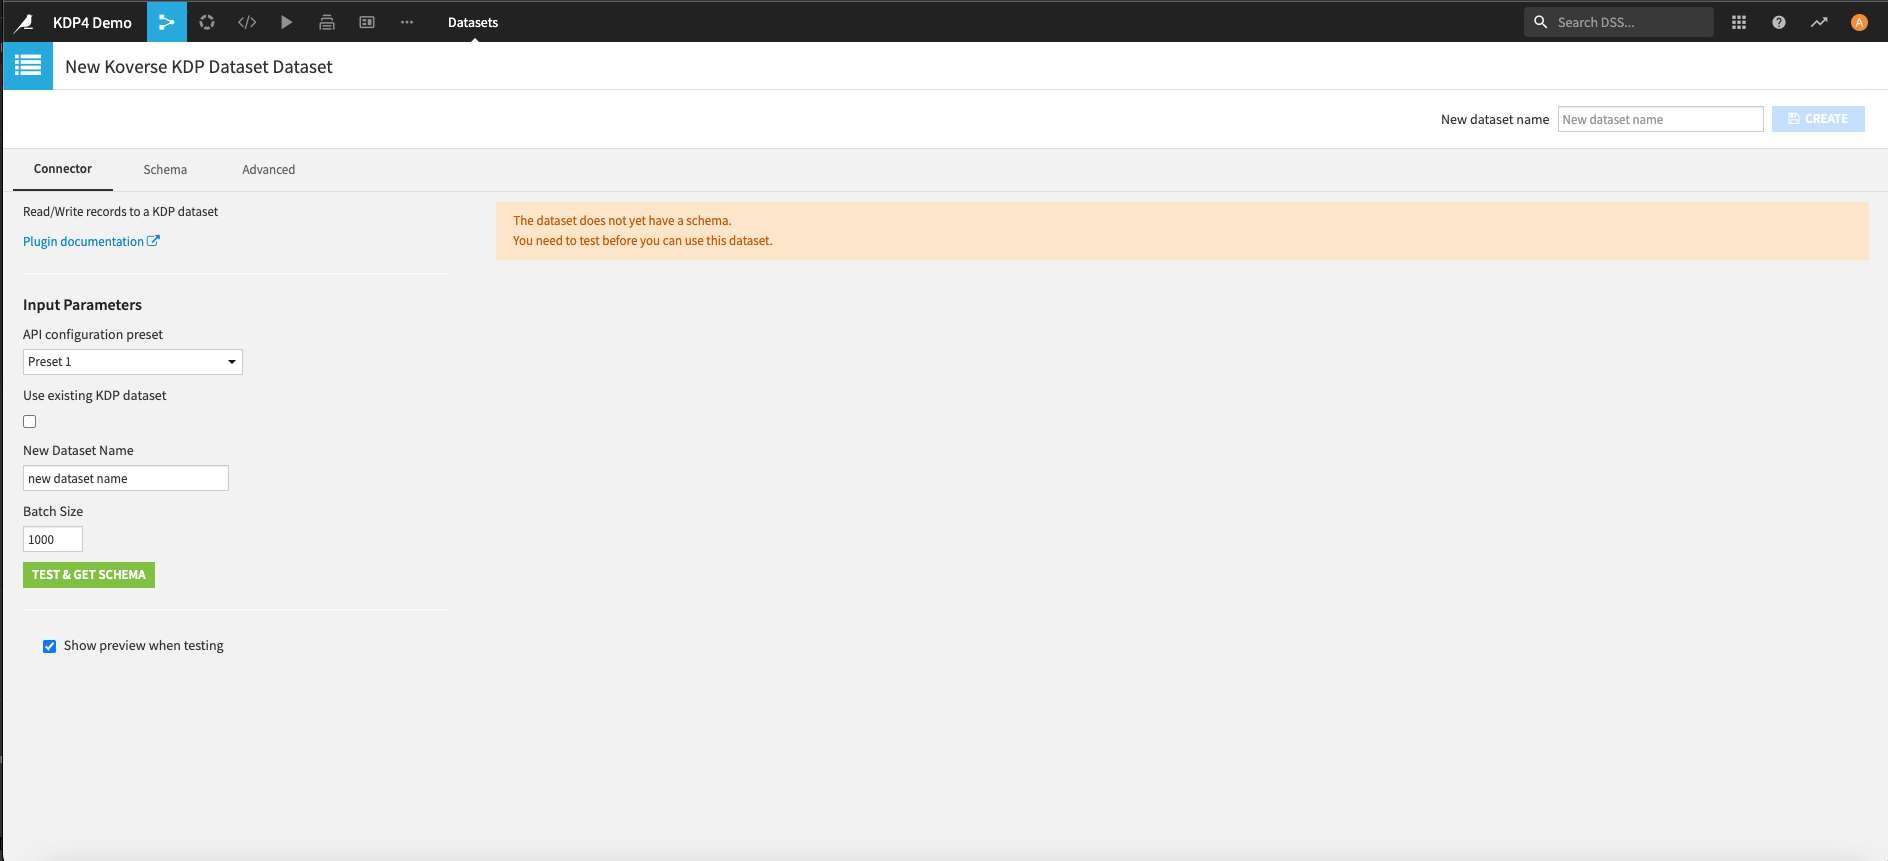
After creation of the new dataset, you can select use_an_existing_dataset and put in the dataset_id of the new Koverse dataset to preview the data.
For Development
Creating New Version of the Plugin
You can test changes outside DSS with the use_connector example (following the instructions contained in that example), or add additional examples/tests in the same pattern. It will require the dependencies listed in requirements.txt to be installed (code-env/python/spec/requirements.txt).
From kdp-Dataiku-connector root... (may require sudo, or use of venv)
pip install -r code-env/python/spec/requirements.txt
Usage
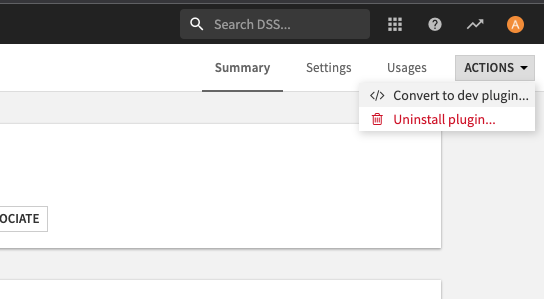
Testing in Dataiku DSS can be done by importing the plugin as detailed in the steps above. A feature branch can be targeted and imported. Additionally, once the plugin is installed, it can be converted to a development plugin in DSS by selecting the menu option from ACTIONS as seen here.
You can then edit in the DSS application. You will have to refresh any open DSS page after saving changes. DSS does have git integration; you can push changes out from DSS to the feature branch as you work with the plugin. The version should be manually updated in the plugin.json to the new minor version and also update the version in setup.py.